March Newsletter 2020
March Gardening in the Greater Jacksonville Beaches area!
- What To Plant
- What To Do
- Plant Focus: Mandarin “Sugar Belle”
- Make Your Bed!
- Starting Plants From Seeds
- Top Low Light House Plants
March is an exciting month in north Florida when we start feeling more confident about planting for warm weather. A freeze is still possible but most north Florida experts feel we are safe from frosts and freezes by mid-March, and recently there’s been a shift to planting even earlier. If not, you can refer to the end of this newsletter. Also, you can always contact us to inquire about a landscape consultation to develop any size project, whether we create a complete master plan, or you simply need guidance on your next DIY project.
CLICK HERE FOR CONSULTATION FORM!
WHAT TO PLANT
If your landscape is vulnerable to hungry deer, more damage may be seen this time of year. Our handout Deer Resistant Plants for North Florida CLICK HERE! has suggestions of annuals, perennials, shrubs, vines and other plants to try.
Annuals (Or Grown As Annuals): You can still plant these cool season bedding plants: supertunias petunias, alyssum (Lobularia), marigolds (Calendula), snapdragons, dianthus, lobelia, nemesia, diascia, dusty miller, verbena, gazania, and geraniums. Most of these will bloom until June or when hot weather arrives. Try to provide at least 4 hours of full sun. Trailing torenia is particularly good for planting now with sustained flowering through the summer. It also doesn’t require, and does better without, full sun. Add helichrysum, bacopa, coleus, senetti, sunpatiens, zinnia, begonia and sweet potato vine when available.

Perennials: Most perennial types can be planted now but wait on some of the cold-tender types. See our handout titled Tropic Life to identify those tender plants. CLICK HERE! Many of the perennials have very long bloom times, including blue daze, salvia, pentas, beach sunflower, gaura, bush daisy, hibiscus, yarrow, plumbago and lantana. Many bulbs can be planted at this time also, particularly crinum, caladium, canna, and agapanthus. Amaryllis bulbs and poinsettias purchased during the holidays can be planted in the landscape. See our handout on Amaryllis care for more information. CLICK HERE! Poinsettias can be planted as soon as the danger of frost is past. Trim fading bracts and choose a spot with 3-6 hours of sun that will not receive artificial light at night.
Other perennials which can be grown a little while longer before it becomes hot include foxglove, hollyhock, dahlias and delphinium.

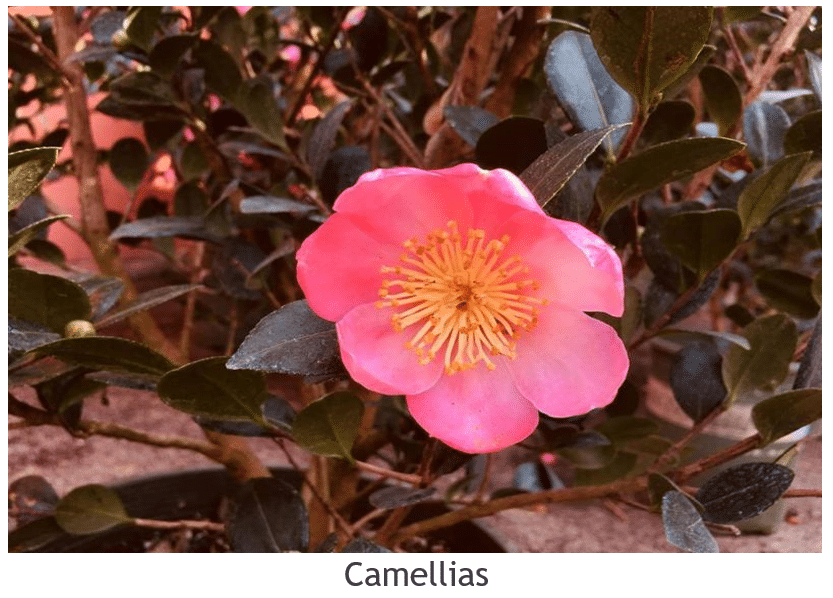
Trees and Shrubs: Early-season varieties of azaleas will still be blooming this month as well as japonica camellias, so if you purchase now you can be sure to get the bloom type and color you want. See our Camellia Variety List for descriptions of the many cultivars we have available. CLICK HERE! Some of the most reliable azaleas to grow here are the Southern Indica hybrids – Duc de Rohan, Formosa, George L. Taber, Mrs. GG Gerbing, and Southern Charm. Deciduous fruit trees and shrubs, if not already planted, can be planted now. Plants established early in the spring (if not done in fall) handle the stress of summer better. At the end of March, satsuma, grapefruit, orange and other citrus can be planted. We are growing some exciting edible shrubs to complement your Grow Your Own gardening. Blueberry ‘Misty’ and ‘Jewel’, Blackberry ‘Nantahala’, Raspberry ‘Natchez’, Black Mission Fig, culinary ginger, and eventually ‘Southern Jewel’ grape, goji berry and turmeric will be available.
CLICK HERE FOR CARE GUIDES!
Lawn: Sod can be planted at almost any time of year, but better when it is actively growing in spring. Summer heat can be stressful but there is usually more rain during this time also. If your lawn failed previously in an area, make sure the best variety is installed for that location and do a soil test. Stagger pieces of sod and fit closely together. Wait 3-4 weeks before mowing and one to two months before fertilizing. If planting plugs, space 6-12 inches on center and don’t mow for at least 2-4 weeks or until firmly rooted, and don’t fertilize until they’ve grown together. Water sod and plugs lightly but frequently for the first month. Don’t apply a pre-emergent herbicide at least 2-4 months before sodding or plugging. If you plan to start or renovate your lawn using seed, it’s best to wait until April. Bahiagrass, centipedegrass and bermudagrass can be started with seed. St. Augustinegrass is not an option for seeding.
Vegetables and Herbs: You can continue planting some cool season vegetables such as kohlrabi, English peas, leeks, mustard greens, arugula, spinach, swiss chard, collards, carrots, radishes, and bunching onions. You may also be able to plant beets, endive, lettuce, potatoes, turnips and celery although these may be less successful if it warms up quickly. Mid-March is a safe date for planting warm season crops. Set out sweet potato slips, tomato, pepper, eggplant and cucumber plants. Seed cantaloupe, corn, southern peas, squash and watermelons. A few plants need warmer temperatures to germinate so you may want to wait until the end of March to plant seeds of snap beans, pole beans, lima beans, and okra. See our handout Vegetable Planting Guide for North Florida for vegetable growing information. CLICK HERE!
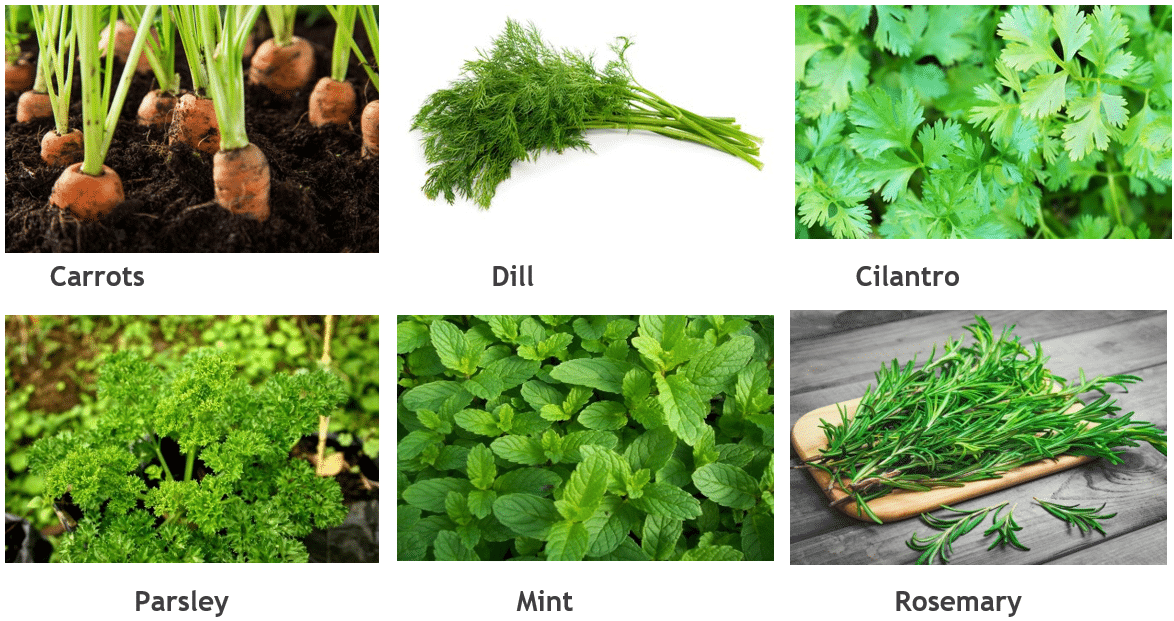
For herbs, grow dill, cilantro, parsley, garden sage, thyme, mint, chives, rosemary, oregano, fennel, marjoram, and Mexican tarragon. Basil can be grown soon but you need to wait on a little warmer temperature. See our handout Herbs for North Florida, for growing and usage information for many of the herbs. CLICK HERE! Also available this month will be a more in-depth planting guide for herbs.
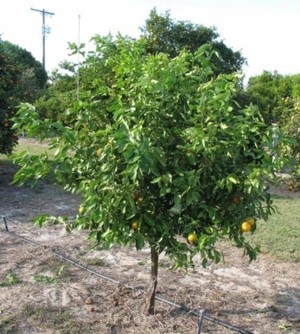
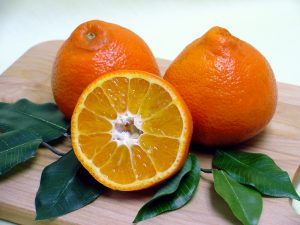
Plant Focus: Mandarin “Sugar Belle”
What to Do
Irrigate: On Sunday, March 10 we change back to Daylight Savings Time and yards can be watered twice weekly – Wednesdays/Saturdays for odd numbered addresses and Thursdays/Sundays for even numbered addresses, outside the hours of 10 a.m. to 4 p.m. Nonresidential properties can water on Tuesdays/Fridays. Use of a micro-spray, micro-jet, drip or bubbler irrigation system is allowed any time. New plantings can be watered any time of day for 30 days post-planting and every other day for the next 30 days. Some trees may require up to 5 months of supplemental watering to establish strong roots; after the initial 2 months, this can be supplied by hand watering. It’s a good idea to check your sprinkler system for any breaks or misaligned spray heads at least monthly.

Mow: The need for mowing will start increasing this month as temperatures rise. Mowing will remove some flowering stalks of annual weeds and make weeds less noticeable. This time of year, you may want to bag your clippings so winter annual weed seeds aren’t distributed on the lawn. Never remove more than 1/3 of the leaf blade at a time and mow to the highest recommended height to support root growth. Here are the recommended mowing heights for several N. Florida grasses: Bahiagrass at 3-4″, Zoysiagrass coarse textured varieties at 3-4″ and fine textured at 1-2″, Centipedegrass at 1 ½ to 2 ½”, Seashore Paspalum at 1 ½ to 2″, and St. Augustinegrass at 2 ½ to 3″ but up to 4″ in the shade with the standard varieties.
Fill Lawn: Fill in low spots in your lawn with quality sterile sand mixed with organic matter, an inch or two at a time. As the grass grows into this, repeat with another 1-2″ layer until the low level is even with existing ground.
Prune: Continue to deadhead old blooms on annuals. Prune summer flowering shrubs and trees if they have not begun spring growth as these mostly flower from new wood. Prune spring flowering shrubs and trees such as azalea, dogwood, redbud, Japanese magnolia, spiraea and loropetalum after they finish blooming. Prune deciduous fruit trees before growth begins, to open and thin the canopy and remove crossing and rubbing branches. Generally, young trees should be trained or pruned to a central leader by eliminating branches that compete with it. Trees allowed to develop with more than one leader are potentially weaker with age. Remove dead fronds and old flowering parts from palms. Before new growth begins, trim Asiatic jasmine to make a denser cover, and cut ornamental grasses to 1-2′ from the ground. Avoid topping crape myrtles. These trees should be pruned to improve their form by removing excess growth in the interior, and eliminating crossing and rubbing branches, seed pods and any suckers. Remove entire branches and don’t leave stubs. About mid-March, if the 10-day forecast shows no risk of frost or freeze, trim tropical plants that may have suffered winter damage (for example, crotons, jatropha, hibiscus, and tibouchina). If severe enough, these may need pruning close to ground level, but most will grow back. Firebush and Salvia also benefit from a trim.
It’s a good idea to sterilize your pruning tools with a disinfectant, between plants. Although a chlorine solution is often recommended, bleach is corrosive to metals and pitted pruners will harbor more microbes that the disinfectant can’t reach. Bleach remaining on the pruners is also damaging to plant tissue. Use Lysol instead – it is minimally corrosive and extremely effective against pathogens.
Clean Beds: Remove old camellia and azalea blossoms from the ground to minimize the spread of disease. Once the soil has warmed toward the end of the month, rake up old mulch that hasn’t decomposed and dead foliage, and add 2-3″ fresh mulch. You may also want to wait on adding mulch if you are looking for volunteers to come up from seed. Finish by renewing a clean edge around your beds with a flat shovel blade.
Fertilize: This would be a good time to perform a soil test for your lawn. Go to http://soilslab.ifas.ufl.edu/ESTL%20Home.asp for online instructions. The general fertilizer recommendation calls for no phosphorus – the middle number in the formula. However there have been an increasing number of lawns showing phosphorus deficiencies (reduced growth and dark green foliage sometimes with purple lower shoots), and a soil test will show aberrancies in other nutrients and pH too.
Wait until most of your lawn has greened up for at least 3 weeks before applying fertilizer (usually late March or even April for some grasses) so it can process the nitrogen. Use a fertilizer that has equal amounts of nitrogen and potassium, and no phosphorus, such as 15-0-15 or 20-0-20.The fertilizer should also have at least one third of its nitrogen as a slow release (non-water soluble) form. In the case of the 15-0-15, this would be 5% as stated on the label. To figure how many pounds of fertilizer is needed, divide 100 by the % of nitrogen (the first number in the formula) on the fertilizer bag. For 15-0-15 this would be 100 ÷ 15 = 6.67 pounds for every 1,000 sq. ft. of lawn. After applying fertilizer, you will need to irrigate long enough to move the granules off the leaf blades and into the soil; this should require only about ¼” of water.
The same fertilizer you used on your lawn (15-0-15) can be used on other plants such as shrubs, trees, flowers and ground covers if it only contains fertilizer (not a weed and feed product). Young trees and shrubs should receive ½ to 1-pound Nitrogen per 1,000 sq. ft. Keep fertilizer away from the base of the plant. Fertilizers formulated for acid-loving plants are better for azaleas, camellias, hydrangeas (if you want the flower color to be bluer), magnolias, hollies, gardenias, dogwoods, beech and blueberries. Fertilize azaleas after their blooms fade. Blueberries should receive just a light application. There is no need to fertilize mature shrubs and trees.
Palms need a high potassium to nitrogen ratio plus added magnesium so an 8-2-12 fertilizer with 4% magnesium works well. Fertilize at the end of March.
Herbs and vegetables will benefit from a slow/continuous release organic fertilizer applied every 3 to 4 weeks. In general, even though it’s a little costlier, try to use a slow release fertilizer or fertilizer with at least 30% as a slow release component. These feed lawns and plants more consistently and lessen pollution.
Mulch: You may want to wait briefly to give soils a chance to warm up before applying more mulch, especially around tropicals. Mulch new plants after planting. Apply a light cover around new vegetable transplants, and seedlings after they germinate. A 2-3″ layer of mulch helps cool the soil and maintain soil moisture, reduce erosion and weeds, and adds organic matter to the soil as it decomposes. Mulch also creates an attractive unified look to highlight your plantings. Florida’s warm and often wet weather can lead to rapid breakdown of mulch, so be on the lookout for our preorder mulch deals.
Control Weeds: To limit developing warm-season weeds in lawns, apply a pre-emergent herbicide when temperatures are 65°F – 70°F for 4-5 days. This generally occurs about the first of March in this area, often when azaleas and dogwoods begin to bloom. Activate with moderate irrigation within 2 days of application.
Many existing lawn weeds this time of year are winter annuals about to flower and die. Mow regularly removing no more than 1/3 of the leaf blade and bag the clippings to remove weed flowers before they go to seed. Avoid the use of post-emergent herbicides during spring green-up. To control nut-sedge and dollar weed, make sure you’re not creating favorable conditions by over watering your lawn. Always choose an herbicide that lists your lawn type on the label.
Monitor and Control Insects and Disease: Continue to monitor pests and disease on houseplants, lawns and gardens. A dose of insecticidal soap or Neem Oil (combats insects, mites and fungus) may be needed on house plants.
Fungal disease can occur almost any time of year, especially if the landscape is overwatered or watered at the wrong time of day.
Watch for discolored areas in lawns, which may be a sign of disease. Large Patch is a fungal disease that can still be a problem in warm season grasses this time of year. Treated lawns will return to a healthy appearance once new growth begins.
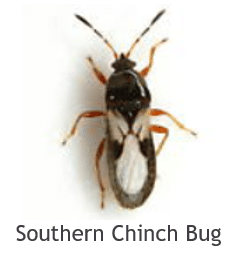
Although all stages are present year-round in most of the state, Southern chinch bugs become more active again about now, sucking the juices from St. Augustinegrass at or just below the soil level. Injured plants look stunted, yellowed, wilted, or dead. Yellowish to burnt-brownish patches are often first noticed along sidewalks or in poorly-irrigated areas. Rotate combination products to reduce resistant populations and spot treat when possible. Also helpful is to avoid fertilizing and reduce thatch thickness to minimize the bug’s habitat.
Frequently scout the vegetable garden as insects are easier to control when first noticed. Horticultural soap sprays will control many soft-bodied insect pests, and a product such as Dipel Dust with Bt (Bacillus thunbergiensis) is useful against caterpillars. Spinosad is particularly effective on caterpillars and thrips (also leafminers, spider mites, mosquitoes, ants and fruit flies) and lasts up to 4 weeks. Additionally, it is safe for people, beneficial insects and adult butterflies, and safe for bees once it has dried. Apply horticultural oil to citrus, shrubs, camellias and deciduous fruit trees while plants are dormant, to control scale. Many insect problems require a combination of pest management products and techniques.
Harvest: Continue to harvest citrus as it ripens. Harvest herbs and cool season vegetables frequently, especially if cool season crops begin to bolt.
Start your Spring Vegetable Garden: Hopefully last month you chose the warm season crops you want to grow and started seeds indoors for those crops you want to give a quick start. If you still need to prepare your garden or grow more seeds, refer to the end of this newsletter for instructions. Most vegetables need to grow about 6 weeks before transplanting to the garden. It is considered safe to plant by mid-March (although see the What To Plant section for those crops which need to wait a little longer), and recently it’s been possible to plant even earlier to beat the heat and insect pests. Here at the beach winters tend to be milder but spring may be slower to heat up.
Prevent Cold Damage: Since we may still have a final cold spell during March here are a few quick tips to avoid damage.
- Delay your spring cleanup of grounds until at least the middle of the month.
- Where possible, provide overhead cover with overhangs, porches and even taller plants.
- Bundle large leaves so they are either pointing up or down.
- Use a freeze cloth. Freeze cloths need to extend over the ground to catch the heat retained there. A string of Christmas lights under the cover can make a difference too.
- Harvest ripe citrus fruit if temperatures will be 28° for 4 or more hours.
- If plant damage occurs, refer to our handout Helping Your Plants After a Freeze. CLICK HERE!
Make Your Bed!
What to Grow: You may already have a productive cool season garden and just need to decide which warm season crops you’ll grow and where. It’s helpful to record the varieties you grew and include any notes you want to remember the following season. It’s also important to rotate crops from year to year to increase soil fertility and break the life cycle of disease organisms and pests. Our handout “Planting Guide for North Florida Vegetables” CLICK HERE! can help you decide on your crops. Use the Plant Family column so you can avoid successively planting vegetables from the same family. Grow what your family likes to eat and if it’s your first time, don’t try too much at once. You can also grow small amounts in 2 week intervals to keep a manageable amount coming.
Where to Grow: If you don’t already have a garden location, choose the sunniest site on your property. Account for any deciduous trees that may block light once they leaf out. Easy access to the kitchen is a plus. If the land has some slope and you garden in rows, align the rows perpendicular to the slope to decrease runoff. Otherwise align them east to west for best sun exposure. Also keep in mind that taller plants like okra, or trellised plants should be located where they won’t block the sun from shorter plants. Some crops can get by with a little less sun than others so if you have some shadier spots in your garden, refer again to our Planting Guide for North Florida Vegetables to see the approximate sun needs for various plants.
How to Grow: Probably the most productive and attractive way to grow a garden, especially in our area where soils lack nutrients and good texture, is to create raised beds. There are many advantages to a raised bed, and one of the biggest is that it doesn’t involve tilling. Tilling has become less popular in the home garden – it contributes to top soil loss, can increase weeds by bringing seeds up where they will germinate, and destroys the structure of the soil and the beneficial organisms living there. Many sites describe how to build a raised bed (for example, the UF document ENH1211). They can be built any size but limiting them to 4′ wide allows you to reach from both sides without walking into the bed. Raised planters complement square foot gardening, first proposed by Mel Bartholomew, which has become a popular and efficient way to garden.
Create your Bed: Once you’ve located your garden, if you’ve built raised beds, it’s time to create your soil mix. A 1-1-1 mix (by volume) of compost, peat moss and vermiculite makes the perfect soil. If you don’t have your own garden compost, then combine different kinds of store compost to ensure you’re putting a variety of nutrients into the mix. Once the planters are filled, mark off 1′ by 1′ squares with a sturdy grid. One-inch-wide strips of wood lath work well for this and give you a constant point of reference for spacing your plants correctly. Refer to our Planting Guide for North Florida Vegetables for suggested number of plants per square foot, for both transplants and seeds CLICK HERE!.
Plant your Garden: Before planting, spray the soil to moisten it thoroughly. Seed packets will list the sowing depth, but generally seeds are planted at a depth about equal to their size or a little deeper. Position trellises as you plant transplants (see our article on How to Make Trellises). CLICK HERE! Lightly water your new plants or seeds in and keep moist. With the right soil mix in the garden, fertilizer is less necessary, as nutrients are added when additional compost is refreshed at the end of the season. Keep your beds tidy and watered. A serpentine soaker hose run through the bed beneath the soil surface is an efficient, water-wise practice. Hand watering can supplement the irrigation regulated by the SJRWMD. Check on your garden daily and harvest often.
Starting Plants from Seeds Indoors
Growing plants from seeds indoors takes minimal supplies – a container, lightweight seed starting medium, seeds and a light source. Trays with transparent covers are also handy to keep soil moist until plants are about 2-3″ tall. A spray bottle can be used to water the containers without displacing the soil.
You can use a variety of containers from paper cups with drain holes to plastic cell packs which have dividers for multiple plants. If you’re growing many plants, its best to use something that will hold up a while and fit nicely with multiple pots in a tray. Since they can be planted right into the ground where they decompose, peat pots are great for growing crops that don’t like to be disrupted once they start growing.
If you want to be ready to plant outdoors as soon as its safe for the plants, you’ll want to start your seeds about 6 weeks before the last expected frost date. The first of February could be your start date in North Florida. This is approximate as crops take different amounts of time to germinate or grow to a size strong enough to transplant. You should also work in some days to harden off the seedling (put it outdoors increasingly longer each day for it to become adjusted to the change and increased sun).
Use a bucket to hold the seed starting mix while you moisten it with water. Dry mix repels water and is more difficult to wet once it is in a container. Fill the container with moistened seed starting mix, press lightly and leave room to water. Refer to the seed packet for the depth to plant the seed. Create a hole with a pencil tip or similar, drop a couple seeds in and cover with more medium. The extra seed is planted in case not all seeds germinate but some gardeners would rather plant one seed and not have to thin any plants later. If you do need to thin plants growing together, it is better to snip off the ones you cull rather than pull them up and risk unsettling the roots of the keeper.
Label your containers with the variety planted and the planting date. Keep your planted seeds warm to speed germination. A heat mat can be used but that can also cause the containers to dry too quickly. It is the water that starts the germination process and once the seed starts taking it in and growing, it can’t go on hold again to grow later – disruption in moisture will kill the seed. Although most seeds don’t need light to germinate, a clear cover will help retain the moisture and allow light to reach the plant once it has germinated. Light can be supplied by a full spectrum artificial source a few inches above the plants if sunlight is not available.
Once the seedlings start to emerge, the tray should be positioned to allow a little air flow. The first set of leaves to emerge are called cotyledons. Up to this point all the energy for the plant has come from the seed. The second set of leaves are true leaves, capable of photosynthesis. When they emerge, you can remove the cover and begin watering with a dilute liquid fertilizer weekly.
When all danger of frost has passed, your warm season seedlings can start the hardening off process by gradually introducing them to outdoor conditions and sun exposure. On the first day put them in a sheltered spot with no sun for 3 or 4 hours then bring them back inside. Add 2 or 3 hours each day to their time outside, bringing them back in at night. After 2 or 3 days put them in morning sun for the first part of the day, move into the shade in the afternoon and bring them in at night. After 7 days the seedlings should be able to stay outside all day in the sun but remember they can dry easily in their small containers. Leave them out at night if the temperature stays above 50°. They can be planted in the garden after 7-10 days. Try not to plant at the sunniest time of day and water them in well. Now they’re part of your garden!
Top Low Light House Plants
If you have rooms with very low light such as north-facing or windowless rooms, there are options to enliven and naturalize your space with living plants. Here is a list of plants that are troopers for their ease of growing and light needs. To increase your chances of success, you can do the following:
- Choose plants or varieties that are solid green or with less amounts of variegation.
- Consider leaving the lights on for 12 hours a day.
- Occasionally move the plants to an area with more light. But be careful to avoid full sun as the leaves will not be accustomed to this.
- Wipe the leaves with a damp cloth or tepid water to remove dust – it interferes with light absorption.
Plants for Low Light
Cast Iron Plant (Aspidistra elatior) – very tolerant of low light conditions and inconsistent watering. Mature height is about 3′.
Chinese Evergreen (Aglaonema commutatum) – choose one with less variegation. Handles dry air but needs moist soil.
Corn Plant (Dracaena fragrans) – Look especially for the variety with the solid green leaf. This plant can take virtually any light exposure, so you don’t need to worry where you place it.
Janet Craig Dracaena (Dracaena deremensis ‘Janet Craig’) – an old low light stand-by for many years. Can reach about 8′ tall eventually. Also survives low humidity and infrequent care.
Kentia Palm (Howea forsteriana) – Give it space to fan out. As a container plant it usually grows to 5-12′ tall.
Lucky Bamboo (Dracaena sanderiana) – can be kept in water (changed weekly) or in evenly moist soil. Often sold woven in interesting patterns.
Monstera/Swiss Cheese Plant (Monstera deliciosa) – can take a wide range of light conditions including low (stronger light allows it to grow faster). It has a climbing habit as it matures so you can either keep it pruned or supply a support. Older leaves can grow to a dramatic 2′ across. Not to be confused with Split-leaf Philodendron, which doesn’t have holes in the leaves and which fares better with more light.
Parlor Palm (Chamaedorea elegans) – although in the long run it would prefer medium light, this palm can tolerate low light for very long periods.
Pothos (Epipremnum aureum) and Heartleaf Philodendron (Philodendron scandens) – I list these 2 together because their appearance and growing conditions are very similar. Pothos varieties can have different variegations to them but if grown in low light they will be green like a Philodendron. The best way to tell them apart is to look at their leafstalks. Pothos have a groove or trough along the stalk whereas Philodendron is smooth/round. Both plants tolerate low light but Pothos with time may become leggy. Pothos is a little more tolerant of sun and drought. Both can climb/trail many feet.
Snake Plant (Sansevieria laurentii) – these come in quite a few shapes and colors from leaves that are sword shaped, short and wide to long and strappy, and even cylindrical. Colors vary from green to green and yellow, with white and even solid gray. Again, the green varieties should do best in low light. Snake plants are also tolerant of dry air and can easily exist on monthly watering.
ZZ Plant (Zamioculcas zamiifolia) – also requires very little water and usually doesn’t exceed about 3′.

